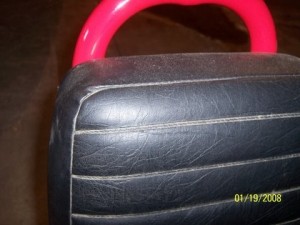
The ski seater seat is an important part of your restoration as it is a highly visible component of your Diablo. If you have an old seat cover in good shape, you can use vinyl conditioners and softeners to clean it up and restore it. Unfortunately, many original seat covers did not make it 40 years, so new seat covers are required.
To start, good wood is needed. Shown above is a 9-ply plywood frame. If you get good quality cabinet wood, it is usually 9-ply and soft enough for your staple gun to penetrate. If the plywood is too hard, you will go through a bunch of work to make a new frame only to struggle to attach the seat cover. The back angle should match the angle of the backrest tube on the ski seater. When installed and leaning against the back of the seat, the backrest should rest up against the tube of the ski seater. Once built, I like to paint the exposed side of the wood flat black.
The original seat foam was 2″ of foam composite which is small pieces of foam shredded and then reglued back together. For most, the foam has deteriorated and requires replacement. The foam I use is 2 1/2″ “Firm” specially made for outdoor use like snowmobile seats. The extra 1/2″ of foam fills out the seat covers well and the “Firm” hardness is just the right amount of cushion to pad the ride.
Use spray on glue to attach the foam to the wood. Staple through the foam into the corner of the backrest. Then trim the foam to form the backrest using an electric knife (not the one from the kitchen! Your spouse will not approve).
Next comes the cover. Above center are the new heat pleated seat covers we have made. Original covers are of two types shown in the lower pictures. The lower left picture is a closeup of the mock seams created by using a heat pleated technique to look like a seam on the very first covers made in 67′. Soon after, the mock seam was made using a different heat pleat design shown in the lower right picture.
Start by laying your new or refurbished cover over the new wood and foam.
Flip the seat over and push the corner inward against a table to hold the corner of the vinyl tight. Note the seam placement along the edge. Whether the seam is in toward the center or down toward the wood frame is of no matter, just try and make it the same along the edge so the edge is smooth.
The stapling process is best done with two people. This being the most important step in the cover installation, try and center the cover the best you can and put pressure against the seat pushing the corner into the table. While doing this, pull the vinyl up over the edge of the wood and install a few staples. Then repeat on the opposing side. Work a few inches of staples in each direction on opposite sides. Pull the vinyl down the backrest and put staples near the edge of the fabric to allow room for a repeating row of staples that will be installed for the back flap.
Continue installing staples down the seat going only a few inches before switching over to the opposite side to maintain a consistent pull on the fabric. The picture above on the right is the front of the seat. Use multiple rows of staples if there is enough fabric to allow this.
To install the back flap, start with the fabric inside out. Staple a row of staples along the top. Then flip the fabric over toward you and fold in the edges. Then staple down each side along the backrest and down under the seat.
Wa La! Just like that, you have a nice new Diablo Seat.


