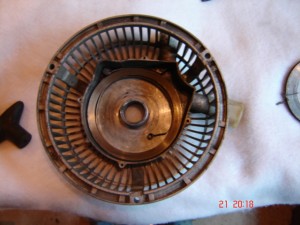
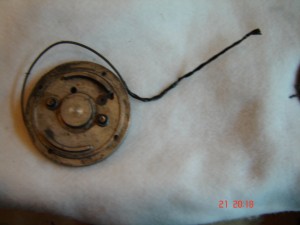
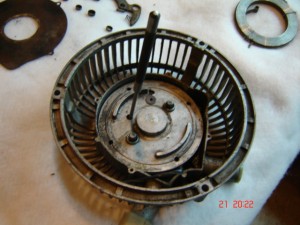
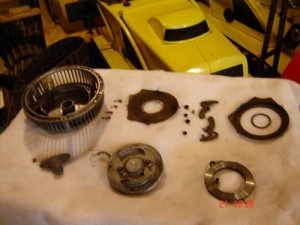
Barrie Graham shows us how to restore a recoil from the JLO.
Tools required:  1 straight screwdriver; long straight
 1/4"punch; vise grip; electrical tape, white cloth

    The first step  in the total rebuild of the JLO recoil
is to remove the pull handle.  If your recoil is off of your
machine, then the handle is already off and the cable is
probably well inside.  Don't fret, I would have you do
that any way.  It saves a lot of skinned knuckles.

    Flip the recoil onto its face with the guts facing up.
Remove the four socket cap screws  with lock washers.
(part # 215)

    Slowly lift off the cover plate (part  #214), giving
special care not to misplace the small parts which are
now loose.  There should be four small cups and two brake
springs.  Each brake spring has a cup on each end.  Place
these small  parts on a white cloth to easily keep track
of  them.  The two starter pawls can be unhooked with their
respective springs and set aside.  If the pawl spring is
broken, it can be reused by bending another hook in the
broken end.

    Lift off the intermediate plate (part # 208) to reveal
the rope drum (part #201).

    Now is when you may want to duck.  The recoil spring
is looped around a post on the starter housing and tensioned
into a slot in the bottom of the rope housing. There is a
hole in the rope drum whereby you can see the end of the
recoil spring.  Place a 1/4" straight punch on the small loop.

    With downward pressure on the punch try to lift up the
recoil drum.  This procedure pushes the spring end out of
the rope drum as you lift on it.  The drum must come straight
up and the spring end straight down for this to work.  If
you like excitement, then just pull up on the rope drum......
and duck!!!  The spring will uncoil with the force of a
hundred jack-in-the-boxes and send the rope drum in any
direction.  The rope drum will remain connected to the spring
and probably whack you in the back of your head on its return
trip.  However, if you were successful with the punch method,
hold the coiled spring and lift it off the post.  Secure the
coiled spring with electrical tape and breath easy.

   On each end of the spring there are loops.  The large
one for the post, the other for the rope drum slot. A spring
can be easily recoiled by making a big loop with the large end
on the outside. Pull on the end with the big loop, making a
smaller set of loops. Continue this process until it is small
enough to fit back into the base of the starter housing.
Secure with electrical tape unless you are ready to install it.

This completes the dismantling.

 Before reassembly, it is important to remove all rust from
sliding parts. Since all internal parts slide somewhere against
something, time is well spent to sand any rusted area, smooth.
The recoil spring cannot be overlooked as there is tremendous
pressure as those coils slide on each other.  If you were able
to remove the recoil spring without it exploding, you should
let it unwind and check it for rust and old sticky grease and
oil. The post in the starter housing and the mating hole on
the rope drum can be cleaned with steel wool.  The two pawls
should rotate freely on their respective rope drum post.
The two brake spring assemblies slide between the two plates
therefore assure that the plates are smooth.

    With all the rust removed, the recoil is ready for reassembly.

   The reassembly of the JLO recoil should take about 20 minutes
if you stay calm and follow the steps indicated below.

1-     place the starter housing ( #200) , face up on a clean
workbench.
2-     place the large flat washer (#216) on to the recoil post.
3-     Do a trial fit of the small loop into the appropriate hole
in the  rope drum (#201).  The loop should fit without forcing.

4-     The spring is easily rewound by gathering it in large loops,
the pulling on the outside end thus reducing the sizes of the
loops.  Continue doing this until it is small enough to fit
within the confines of the starter housing. The end of the
spring with the large loop should be on the outside of the
coiled spring. Place this loop over the large post inside
the starter housing.  The end of the spring should face in an
anticlockwise direction when placed on the post. JLO recoils
can be operated in either direction, depending on which way
the spring and dog are installed.


5-     Fix the end of the starter rope into the rope drum.
Securely attach electrical tape to the other end of the
cable and create about 6” of a “tail”so you can later
retrieve the cable. Wind the cable and tape on to the
drum leaving a little above the drum so that you can
hold it.


6-     Since you did step #3 you know which hole to put
the straight punch through. Do this, then put the punch
into the small loop. The punch acts as a guide and
manipulator of the loop.  Press down lightly on the
rope drum and rotate it until it drops down.  Sometimes
the spring end is bent and will not co-operate but
since you did step #3…..There should now be a small
end of electrical tape sticking up from between the rope
drum and the inner wall of the starter housing.


7-     Feed the electrical tape through the wall of the starter
housing and pull it out about 12”.  It is not necessary to
wind the spring and give it cable “recoil tension” at this
time.  When we pull the cable through the dash, we must
extend the cable about 20”, this “charges” the spring.

8-     Adjust the Vise grips and clamp them on the cable.
9-     Slide the rope guide bushing over the cable
10- Reposition the Vise grips and screw the rope guide bushing
into the wall of the starter housing.
11- Tie a loose knot in the cable and let it slowly recoil to
a “rest” position.
12- Replace the intermediate plate (#208)
13- Replace the starter pawls with springs
14- Replace the brake cups and springs
15- Replace the cover plate #(214)

16- Replace the four screws to retain the cover plate.
Before tightening the screws, it is best to give the cable
a short pull to ensure that the brake cups are properly set.

If the recoil spins freely, you are now a JLO recoil expert.

Parts for JLO 252 Recoils can be found on ebay.

CONGRATULATIONS

(Barrie Graham - Arundel, Quebec)
